
With the addition of core magnets in GAN's flagships, the new corner-core magnetization has been applied to other speed cubes such as the MoYu RS3 M 2020, and MoYu WeiLong WR M 2021 MagLev and Lite. Cuber's Home has created an easy to install magnetic core kit, making it easy to add corner-core magnetization to your WR M 2021.
Table of Contents
Watch the video tutorial above.
Parts Needed
- MoYu WeiLong WR M 2021 MagLev or MoYu WeiLong WR M 2021 Lite
Note that the WR M 2021 Lite is the same as the WR M 2021, just with reduced packaging, whereas the MagLev variant replaces the springs with two repelling magnets in each center. - Cuber's Home Magnetic Core Conversion Kit - WeiLong WR M 2021
- Superglue - typically available at hobbyist or hardware stores
- Phillips head screwdriver - included with the WR M variants
Disassembly
After taking the cube and the magnetic core kit out of the packaging, take off two center caps on opposite sides.
 |
 |
Once taking off the center caps, unscrew both opposite screws enough so that an edge can be pried out of the cube. Fully disassemble by removing all edges and corner pieces of the puzzle. Set the corners and edges aside.

Fully unscrew the opposite centers, being careful to not lose any pieces, including the screw and two repelling magnets/springs found underneath the screw. Set these pieces aside.
 |
 |
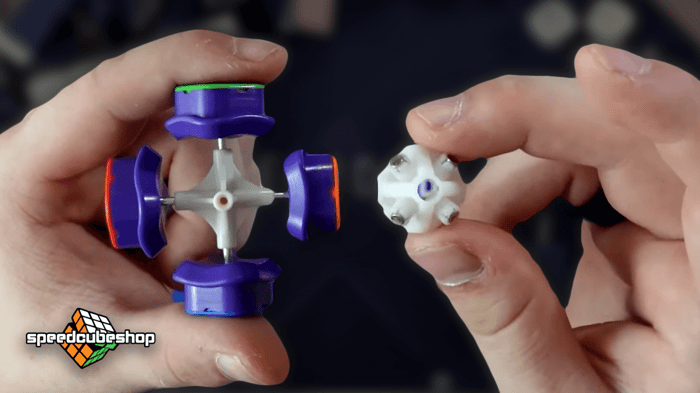
Installing Core Magnets
Now the core is exposed, the core magnets can be installed. The magnetic core conversion kit comes in two halves, and small detachable bits that will be added to the corners - set these pieces aside.
 |
 |
Place one half of the core conversion kit on one of the sides where the screw and center were removed, and place it firmly. Flip the core over.

Take note of the other half of the core magnets. Ensure that the clips of the installed center half are adjacent to the clips on the other half - in an "X" configuration.
Press both ends together until an audible "snap" is heard to install the core magnets - this may take some force.
 |
 |
Installing Corner Magnets
Take all of the corner pieces of the cube and separate these from the edges. Each corner has a small hole in the stem on the bottom - this is where the small corner magnets that were set aside from the previous step will be installed.
Take a small magnet, and apply glue to the side that does not have a magnet. Only a small, thin layer of glue around the surface is necessary.

Once the glue is applied, immediately take a corner and stick the glue-applied side into the corner stalk hole. Leave it for a moment to dry then set aside. Repeat for the other seven corners, and set aside for a sufficient amount of time to dry - refer to your superglue packaging for drying time.

Reassembly
While the glue is drying, you can reattach the two centers with their screws and magnets/springs back to the core. Take the center with the screw and it back in, ensuring that the screw is aligned straight with the core to avoid stripping the core. Repeat for the other screw center which was removed. Don't fully screw in the two screws, as after the cube is re-assembled you can fix the screw tensions.
Ensure that the magnet has dried sufficiently in the corners by giving the corners a slight shake - the magnets should not fall out if sufficiently glued in.
Reassemble the cube as per standard.

Conclusion
Once reassembled, you can tension the sides, adjust the dual adjustment system and lubricate to your preference if you so desire.

Learn more about speed cube lubricant here.